
Antivirus And Security
How to clean dust from PC
Aug
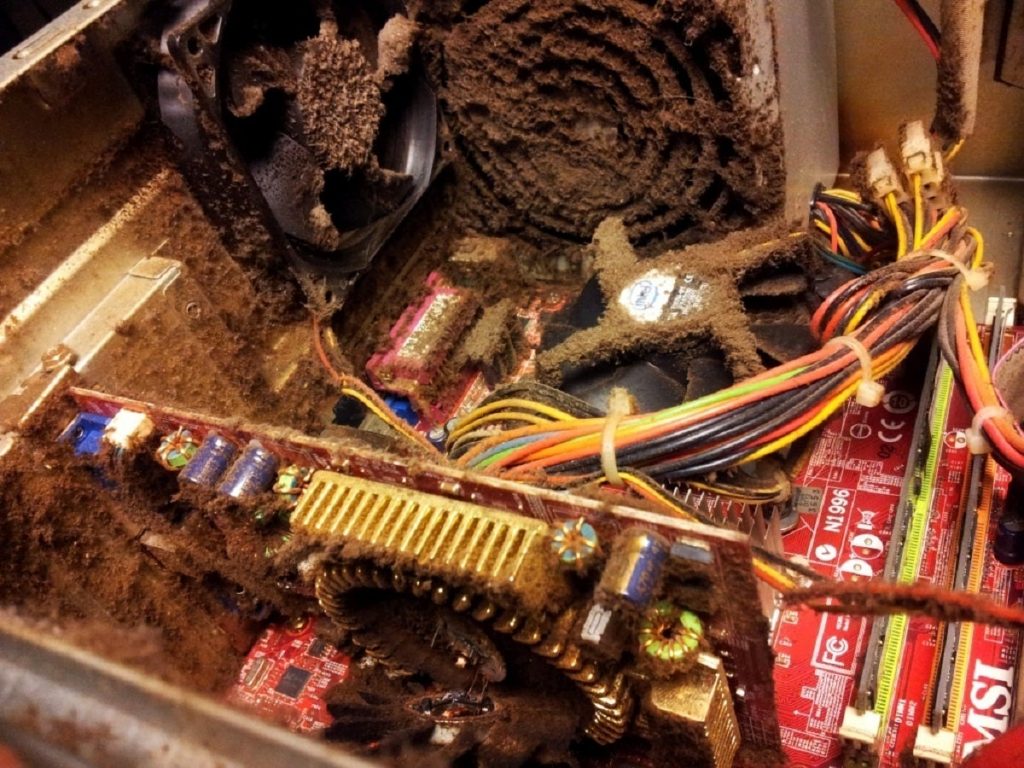
Seeing images of dirty computers is disturbing, I know that all too well. It is hard to believe that a computer can be exposed to such a level of negligence, but it is something that happens very often. The good news is that it has a solution. Cleaning a computer is an essential maintenance task, and its duration will depend on several factors. However, the basic parameters remain intact in all cases, and it is not necessary to spend a fortune.
Clean a computer
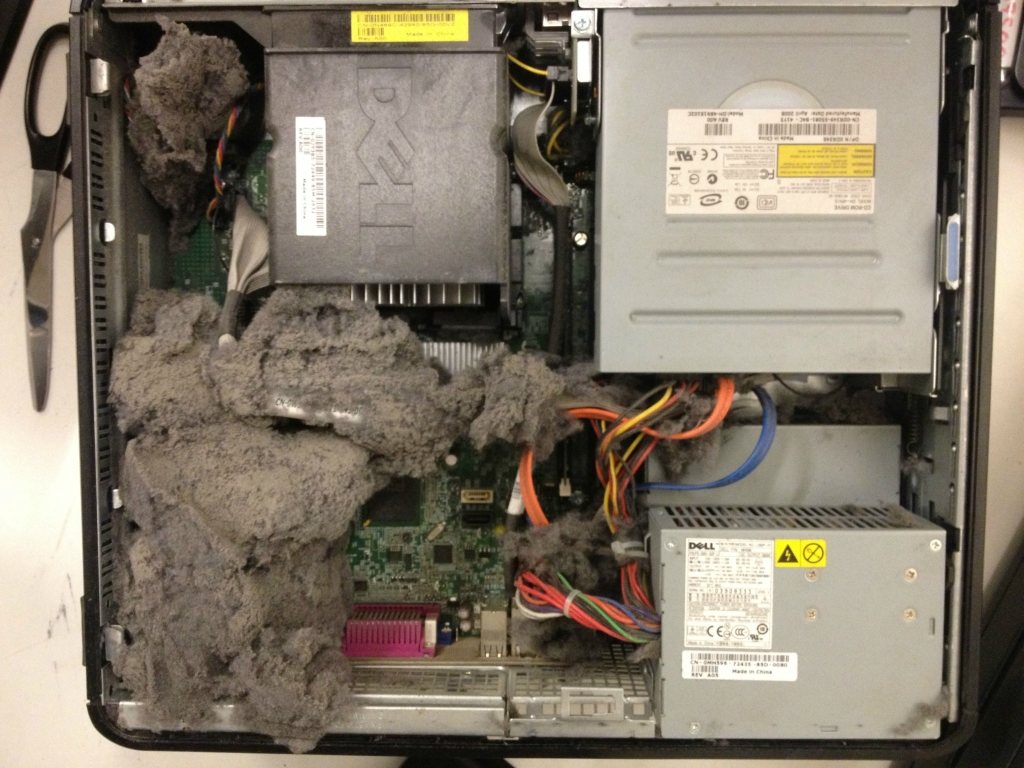
The computer starts to malfunction. The fans try harder, the frames per second fall, and the occasional blue screen makes its visit. You observe the temperature readings, and your suspicions are confirmed: The inside of the PC is an oven. You open the carcass and discover the equivalent of a couple of years of dust (gray, black or brown, courtesy of cigarettes),dead skin, hairs, flies, mosquitoes, cobwebs… ugh .
The famous “I do it tomorrow” informs you that your credit is over. It’s time to get your hands dirty, your clothes, everything. “How to clean dust from PC” isn’t a question that power users ask themselves very often, but if it’s the first time you have to cross swords with that mysterious grime and you don’t know where to start, don’t worry. Your main resources are three.
1. Time

Sorry, it’s non-negotiable. The computer must be completely disconnected, out of its usual place, and placed in a large space that allows you to maneuver (ideally away from the house),but if you have pending things try to finish them first, because cleaning the inside of any PC is a compromise. Once you start, you won’t stop until you’re finished.
A half-clean involves reconnecting, moving, opening and closing the PC sooner than you imagine. Granted, the more frequent the cleaning sessions the less work will be in each one, but one day you will not be in mood, or in the right physical conditions (the flu and colds do not ask permission). Quality over quantity, and a lot of patience.
2. Compressed air

The dust will not leave the computer without a significant amount of persuasion, and that is when the compressed air intervenes. The easiest option is to buy it in a can. They are safe, they do not stain, there are different prices, and one should be enough. He starts shooting, and lets the dust fly. When attacking the fans, it is recommended to hold them with a finger so that they do not rotate, and thus avoid damage.
Don’t forget to clean the processor and graphics card heatsinks (if you have one),or the spaces between the memory modules. The power supply requires special attention. Your fan expels air from the housing, and a lot of dust gets trapped inside. The classic air compressor is valid as long as it is not too powerful (some models can regulate its output), and does not spit oil. Several sites suggest a hair dryer using its cold mode, but personally I don’t follow that route.
3. A brush

The compressed air works wonders with the thick part of the dust, but once you’ve removed it you’ll see a certain “film” of very fine dust that covers almost everything. That’s the time for a soft-bristled brush to enter the equation, and apply a “1-2” with brush and air. Some guides recommend a toothbrush to access the more complicated areas, but a small brush works just as well, and there are brushes that are “too hard”. Let your eyes be the judges. If you’re convinced you’ve removed all the dust, it’s time to shut down the system and put it in place, unless… that the dirt is much worse.
4. Extreme situations and differences

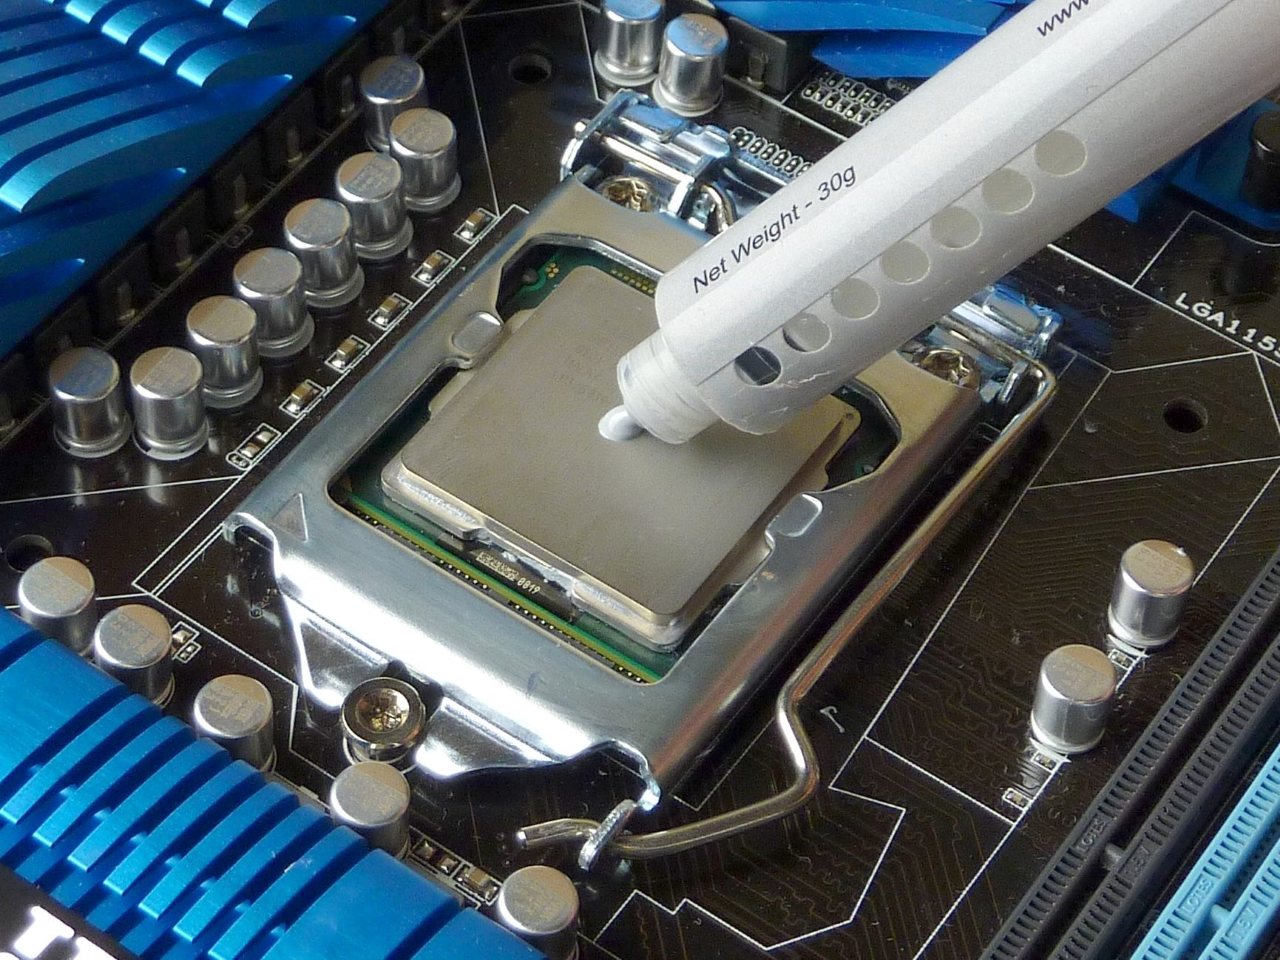
There are times when dusting is not enough. If after all that work the computer does not exhibit adequate thermal behavior, it is most likely necessary to replace the Thermal Paste on the chip. The process boils down to removing the heatsink, cleaning the old paste with isopropyl alcohol (both on the block and on the chip), placing some new paste (follow the instructions in terms of location and quantity), and reinstalling the heatsink without forgetting the fan connection to the motherboard. Some users do not hesitate to play this on their graphics card, but it requires much more care, especially when removing and reinstalling the heatsink.

Through the Web you will find a very wide list of recommendations. There are those who prefer to disassemble the entire computer, those who use soap and water to clean the case once the components have been removed, those who reject compressed air for fear of statics, those who wash their parts completely (technically possible… under the right conditions), and much more.

